Step-by-Step Guide to Building Your Own Mini Jet Boat
Building Your Own Mini Jet Boat: A Step-by-Step Guide to Aquatic Adventures
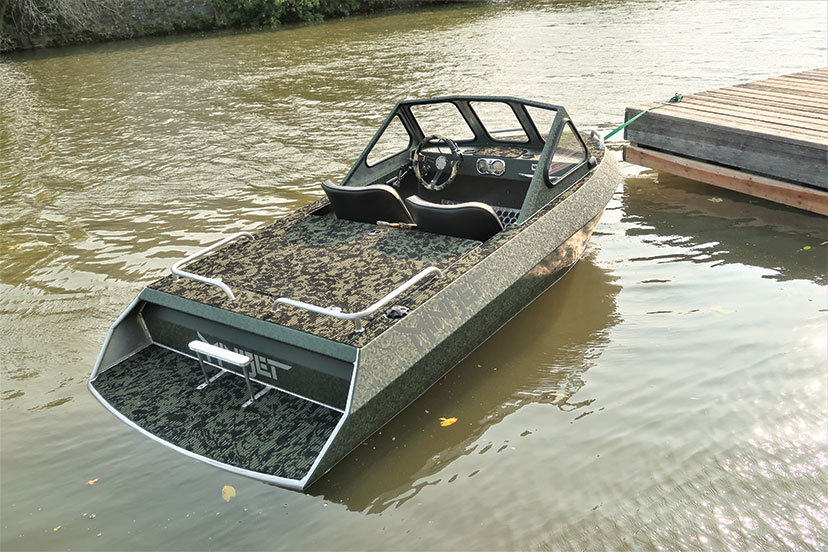
The allure of a jet boat is undeniable. They're nimble, powerful, and capable of navigating shallow waters that leave traditional propeller-driven boats stranded. But the cost of a ready-made jet boat can be daunting. That's where the DIY spirit comes in. Building your own mini jet boat allows you to customize your dream vessel, learn valuable skills, and enjoy the satisfaction of creating something truly unique.
This guide will walk you through the process of crafting a mini jet boat, from choosing materials to launching your finished masterpiece. Whether you're a seasoned boat builder or a novice eager to learn, this comprehensive step-by-step plan will equip you with the knowledge and confidence to take on this exciting project.
Step 1: Planning and Design
Before you dive into the construction, it's essential to have a clear plan in place. This includes determining the boat's size, shape, and features.
1.1 Size and Shape
Consider the size of your boat based on your intended use and storage capabilities. A smaller boat is easier to transport and handle, while a larger boat can accommodate more passengers and gear. The shape of your boat will influence its stability, maneuverability, and speed. Explore different hull designs, such as V-hulls, flat-bottom hulls, and catamarans.
1.2 Features
Determine what features you want your boat to have. This might include seating, a storage compartment, a steering system, and safety equipment. Think about the ergonomics of the boat and how you'll be using it.
1.3 Materials
Choose materials based on your budget and construction skills. Common options include fiberglass, plywood, and aluminum. Consider the weight, durability, and ease of working with each material. Fiberglass is lightweight and strong but requires specialized techniques, while plywood is more affordable but less durable.
Step 2: Gathering Materials and Tools
Once you've finalized your design, it's time to gather the necessary materials and tools.
2.1 Hull Materials
Purchase the materials for your boat's hull. If you're using fiberglass, you'll need resin, hardener, fiberglass cloth, and a mold. For plywood, you'll need sheets of marine-grade plywood, epoxy resin, and fiberglass cloth for reinforcement.
2.2 Jet Drive
The heart of your jet boat is the jet drive. Choose a jet drive unit appropriate for the size and power of your boat. Consider factors like thrust, efficiency, and noise levels. Many aftermarket jet drive units are available for mini boats.
2.3 Engine
Select an engine that matches the size and performance of your boat. You'll need to consider horsepower, weight, and fuel consumption. Small outboard motors or gasoline-powered engines are common choices for mini jet boats.
2.4 Tools
Make sure you have the necessary tools for building your boat. This may include:
- Saw
- Drill
- Screwdrivers
- Sandpaper
- Measuring tape
- Level
- Clamps
- Safety gear (gloves, goggles, mask)
Step 3: Constructing the Hull
The hull construction process will vary depending on your chosen materials.
3.1 Fiberglass Hull Construction
If you're building a fiberglass hull, you'll need to create a mold. The mold will define the shape of your boat. Once the mold is prepared, you'll layer fiberglass cloth and resin onto the mold. Allow each layer to cure before applying the next. Remember to use proper ventilation and safety precautions while working with resin.
3.2 Plywood Hull Construction
For a plywood hull, cut and assemble the plywood sheets according to your design. Use epoxy resin to bond the pieces together and fiberglass cloth for reinforcement. Carefully seal all seams to prevent water penetration.
Step 4: Installing the Jet Drive
Once the hull is complete, install the jet drive unit.
4.1 Mounting the Jet Drive
Follow the manufacturer's instructions to mount the jet drive unit to the transom of your boat. Ensure the unit is properly aligned and secured.
4.2 Connecting to the Engine
Connect the jet drive unit to the engine using the appropriate shaft, coupling, and other components. Make sure all connections are secure and properly lubricated.
Step 5: Installing the Engine
Install the engine in the designated area of your boat.
5.1 Engine Mounting
Mount the engine to the boat using a sturdy engine mount. The engine mount should be properly aligned and secured to prevent vibration and movement.
5.2 Connecting Fuel and Electrical Systems
Connect the engine to the fuel tank and electrical system. Make sure all connections are secure and properly grounded.
Step 6: Final Touches and Refinement
Now it's time to add the finishing touches to your mini jet boat.
6.1 Interior and Seating
Install seating and any other interior features. Choose materials that are comfortable, durable, and easy to clean.
6.2 Steering System
Install a steering system that allows you to control the boat's direction. You can choose a mechanical steering system or a hydraulic system.
6.3 Safety Equipment
Install essential safety equipment, including life jackets, a fire extinguisher, and a whistle. Also, ensure you have a first aid kit and a distress signal device.
Step 7: Testing and Launching
You've put in a lot of hard work, and it's time to see your creation come to life.
7.1 Initial Tests
Before launching your jet boat, perform some initial tests on dry land. Start the engine and check for any leaks, noises, or vibrations. Make sure all systems are functioning properly.
7.2 Launching and Sea Trials
Once you're confident that the boat is ready, it's time to launch it into the water. Start slowly and test the boat's handling, steering, and speed. Make any necessary adjustments to optimize performance.
Conclusion
Building your own mini jet boat is a rewarding and fulfilling project. By following these steps, you can create a custom-made vessel that will provide you with hours of enjoyment on the water. Remember to prioritize safety, take your time, and have fun with the process!
0 comments:
Post a Comment
Note: Only a member of this blog may post a comment.